Real Estate Photography 101
Real estate photography is one of the most challenging types of photography out there! Interiors frequently have both spectrums of light…Blinding ambient light from the windows mixed with the low incandescent light from indoor lighting. Even with the best DSLR camera in the world, it is not an easy task creating a pleasant image with extremely different light sources intermingling within the same scene. The sensors in high dollar cameras will never be able to expose for these extreme lighting differences the way the human eye can. When you sit in a room, your eye can adjust for the blinding light coming from the window and see the room in a pleasant way….a camera cannot. By adding a single flash to a camera, real estate shots will improve in some cases (small rooms), and will frequently suffer in other cases because of hot spots and reflections caused by the flash (not appealing). Unless you have the time and money to invest in classes and a long list of equipment and software, getting good results on your own will be a daunting task. If you do, then I support you in your endeavor and wish upon you much success! Photography is a great hobby and possibly a profession if you really enjoy it. However, for most of us, this is simply not the case. That’s where we come in! Using off camera lighting and post processing, we are able to deliver photos that encompass the scene how the eye sees it!
Considering that over 90 percent of home buyers search for their homes online prior to scheduling showings, it has never been more important to provide outstanding photos of your listings. Not just of homes in the upper price ranges, but on any home! Buyers will pick the homes they want to see by how they are represented on the MLS, and making a great first impression of the home is key in generating showings and offers. Many great homes are skipped-by due to poor images posted on the listing. The MLS also provides a way for buyers to re-visit homes that they have seen, but buyers often forget many of the key features that they liked during the showing because they looked at 8 or more homes that day. Given two equivalent homes, the one with the better listing photos will win out every time and attract the most showings and offers hands down! Considering that the standard real estate commission is 3 percent of the sale, paying 250-350 dollars (average size home) for a professional photographer to shoot your listing is a mere drop in the hat! I guarantee you will make that up by yielding a higher price offer. If you are a home owner, you should demand professional images from the agent selling your home! Too many agents try to increase their size of their own wallet by decreasing the costs of their listing. This will usually include using a “run-n-gun ” brokerage photographer, or taking sub-par photos themselves (even with the dreaded camera phone!!!). I have seen it all. Below, are a few simple examples showing the difference between a typical photo and a good photo. Click on the photos for a larger view… BIGGER!
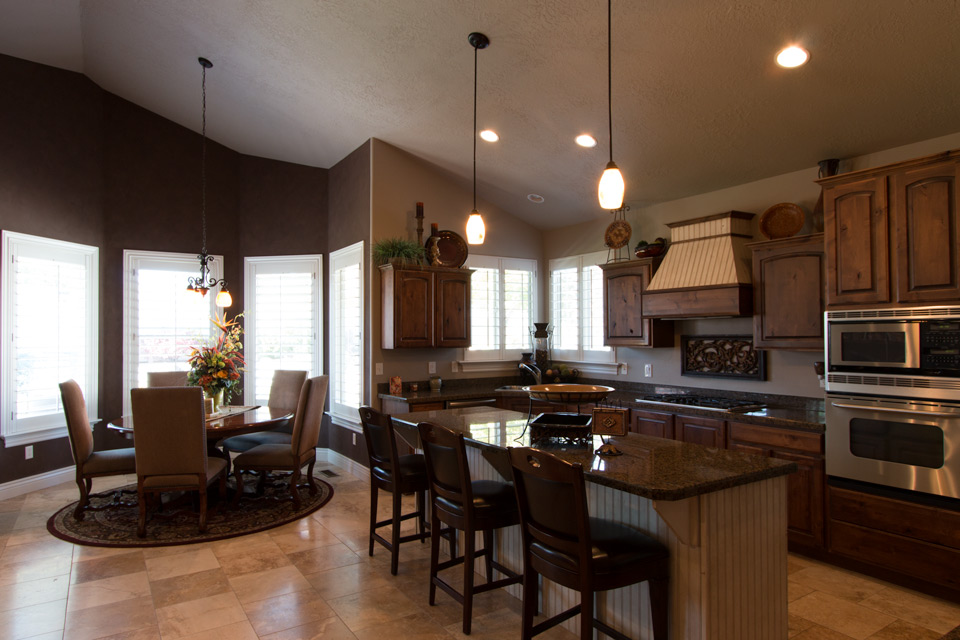
Before . . .
After . . .
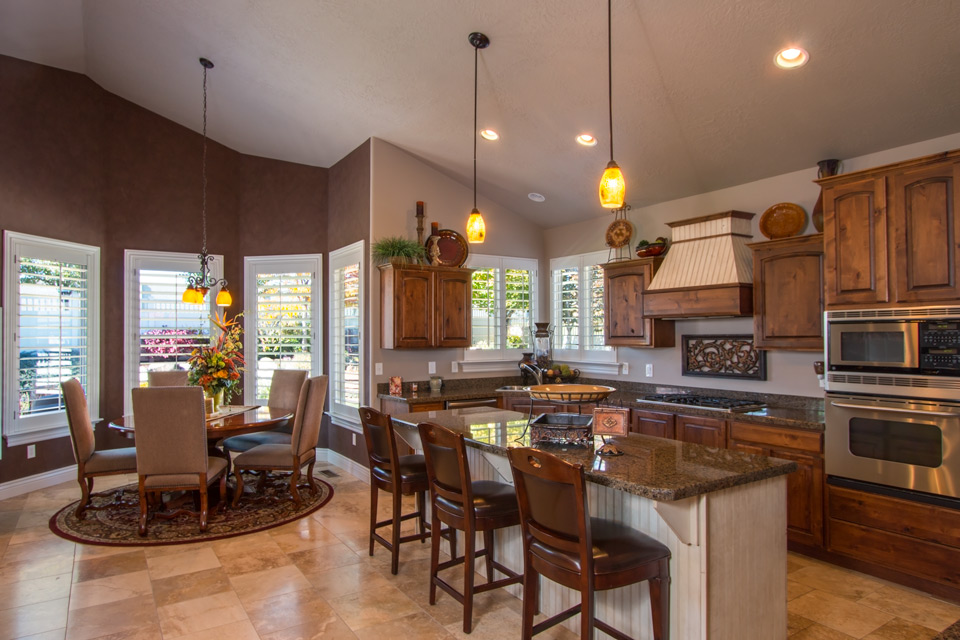
As you can see, The photo to the right is clearly superior to its counterpart. The original photo is how a very high end DSLR camera exposed it with an auto setting, and quite typical of most the photos on your local MLS. The windows are highly over-exposed, while the interior is highly under-exposed. The camera cannot expose for both lighting sources… it’s impossible, even with manual settings. Sometimes it’s appropriate to slightly overexpose the window, especially if there is nothing to see out the window (or nothing you want to see). In this particular case, there is a nice back yard with fall foliage colors outside the window…so, I expose properly for the window and add off camera lighting to create an image that is more how it looks while standing in the room. Besides just being brighter and having better overall color, you can see so much more detail in the cabinets, flooring and the rug under the table. I also use some post processing to add just a bit of sparkle to the image, but not much. We do not want to make it look like something it’s not.
Here is another example of a beautiful kitchen that is incredibly bright and breath-taking in person, but very difficult to translate in a photograph. Again, click on the photos for a larger view… BIGGER!
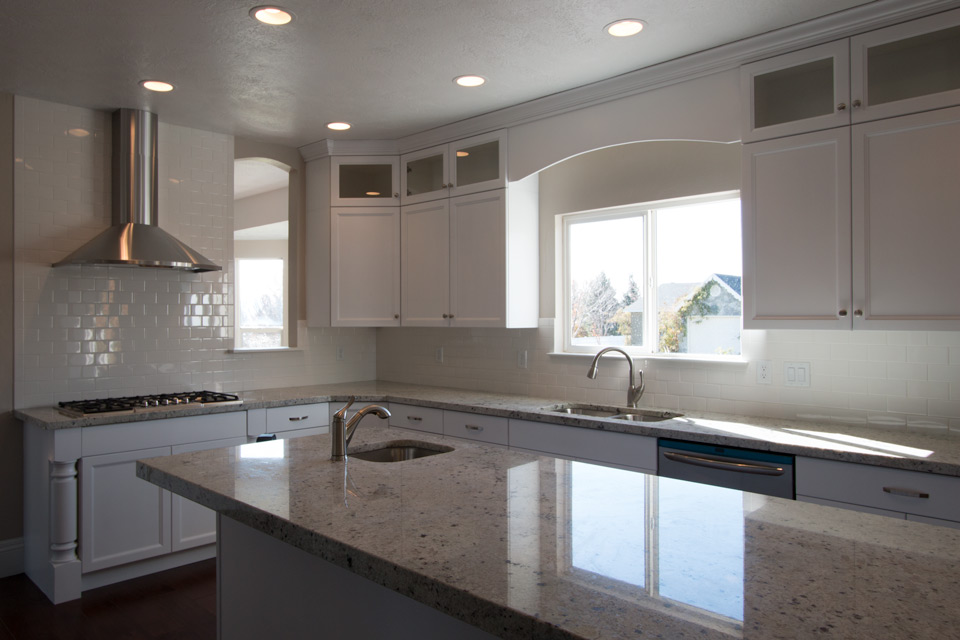
Before . . .
After . . .
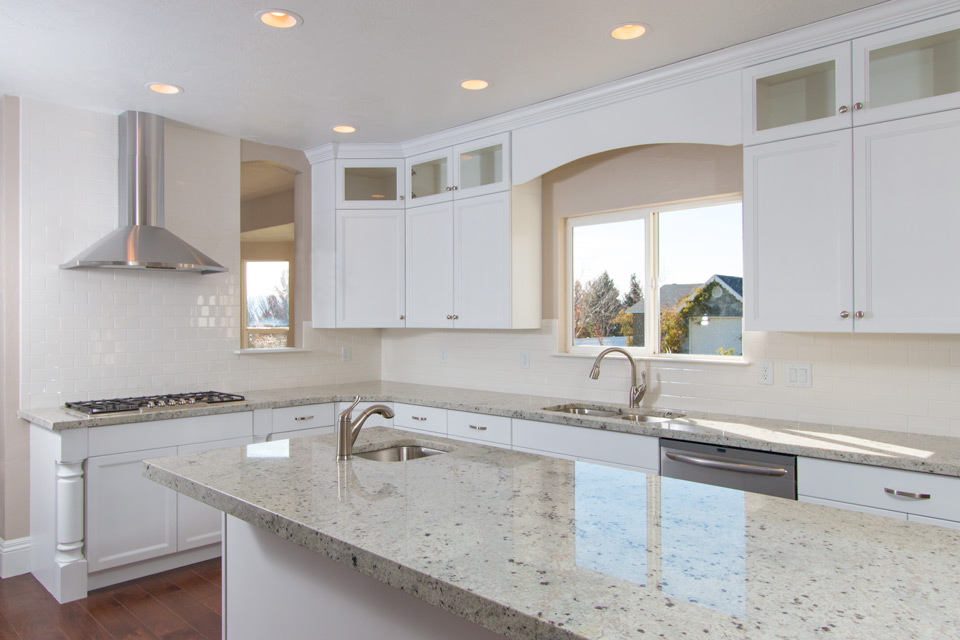
Much like the previous example, the windows are slightly over-exposed and the interior is way under-exposed in the photo to the left. This was shot with a professional DSLR in manual mode, trying to expose somewhere in the middle of the bright windows and the interior of the kitchen. In person, this kitchen is bright and amazing, but very difficult to photograph mid-day with the extremely bright light from the windows. By carefully adding off camera lighting and a bit of post processing, we are left with the photo to the right. Again, this is a much better representation of how it looked in person…stunning!
Another example using a dining room from the same shoot as the first kitchen example… Click on the photos for a larger view…I’m sure you get it by now… BIGGER!
Before . . .
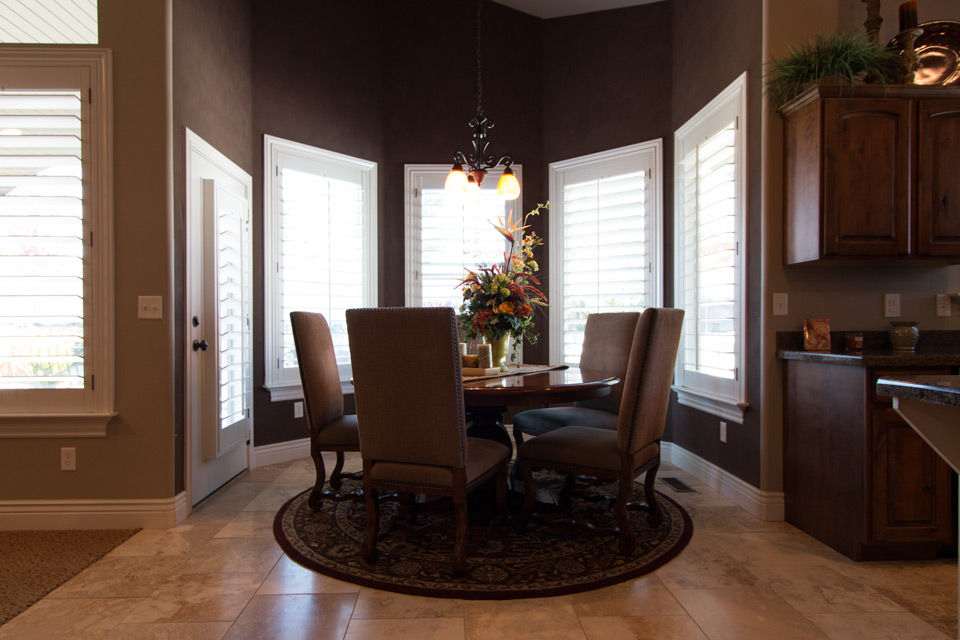
After . . .

More of the same. The photo to the right is far superior, shows much more detail and represents how the room appeared in person.
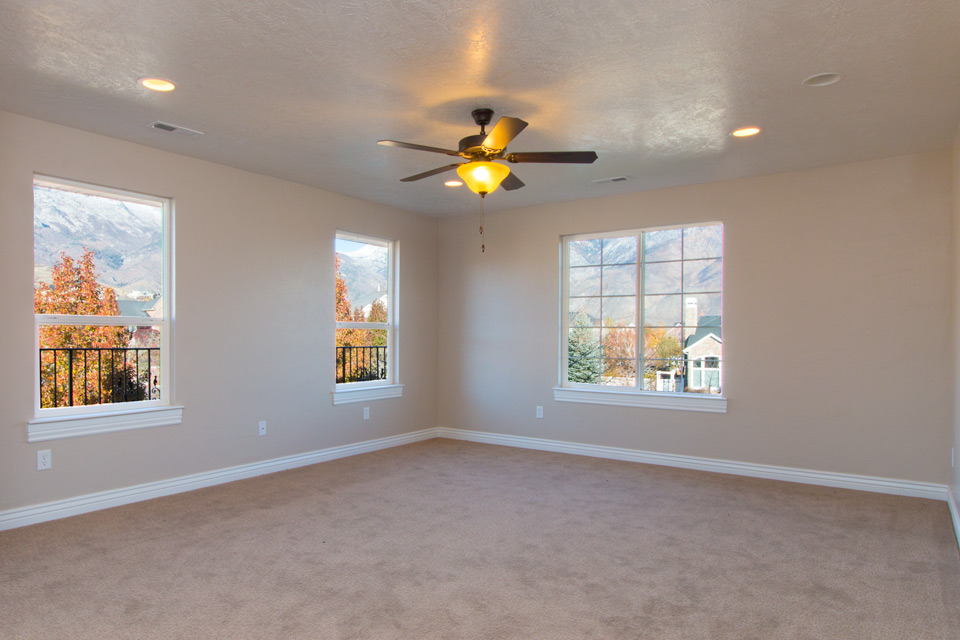
A few more examples…
Before . . .

After . . .

Before . . .

After . . .
If you really want some entertainment and great examples of what NOT TO DO, check out this LINK or this LINK . Or honestly, just log on to the Wasatch Front MLS service and you can find many examples of what NOT TO DO in regard to listing photos.
Check Out Our Past Projects! >>>
Don't Settle For Mediocre Listing Photos!
Get more showings, more offers, and higher price offers!
Schedule Now!


Recent Comments